Knife Skills 101: How to Use a Knife with 5 Core Cutting Techniques
Time to read 10 min
Time to read 10 min
You don't need to master knife skills; you only need to be proficient and confident. Take it slow, pace yourself, learn as you go, and understand that developing your knife skills will take time. Being comfortable with a knife is single-handedly the most important skill to have when it comes to cooking.
So, whether you're brand new to the kitchen or getting more serious about using your knives properly, understanding the fundamentals of knife work is one of the best ways to level up your cooking, and more importantly, actually look forward to prepping!
This guide walks you through:
Let's start with the grip.
Check out the YouTube video below to see all these techniques and tips in action!
Table of Contents
How to Hold a Knife
If you're still using a four-finger wrap around the handle grip like you're about to hammer some nails, it's time to graduate to the pinch grip, which is the first step in developing your knife skills. With this technique, your index finger and thumb "pinch" the base of the blade, above where it meets the bolster or handle, while the rest of your fingers wrap loosely around the top half of the handle. The pinch grip gives you the most control, precision, and safety when dicing and dicing.
The pinch grip places your hand closer to the middle of the knife, providing a more balanced feel, and allows the knife to move as an extension of your arm rather than wobbling at the wrist.
No matter the blade style, whether a German Wusthof Classic or a Japanese Hand-forged Enso Aogami Super, this is the most stable and recommended grip for 95% of your cutting tasks.
How to Position Your Guide Hand
Your non-dominant hand becomes your guide hand, which should always be positioned to protect your fingers from the blade while also guiding the knife where it needs to be. Aiming at where you need to cut isn't always visual; with an experienced guide hand and proper knife skills, you could chop blindfolded!
The standard technique is to form a "Claw" shape: your four fingertips angle down and inward slightly towards the cutting board. Your thumb is to the back, bracing the ingredient you're cutting, NOT alongside your other fingers. The flat area between your first and second knuckles should be perpendicular to the board and parallel to the side of your blade.
The Claw positioning allows the knife to ride along your fingers, mainly your middle and sometimes your pointer, without ever coming into contact with your tips since they are angled away from the knife's edge. In the beginning, this may feel awkward, but it quickly becomes second nature with repetition. Whether dicing onions or chopping herbs, maintaining this consistent form with your guide hand is critical for accuracy and safety.
Now that you know how to position your guide hand and hold a knife, whether a Chef's, Santoku, Nakiri, Bunka, or any other style in your kitchen, it's time to use it.
The first cutting technique we'll cover is slicing. Why? Well, most ingredients, like an onion, are sliced first before being broken down further and chopped into a small dice.
There are three primary slicing knife skills to learn:
The first slicing method is a single-motion slice. Depending on the blade shape of your knife and the size of the ingredient, you'll either pull back with your knife parallel to the cutting board, at about a 45° angle, or you'll anchor the tip of the knife on the cutting board, with your wrist angled upwards, and then pull back dragging the tip of the blade along the board.
The next slicing method is a two-motion movement. The first thing you do is slightly push the knife forward into the ingredient, anchoring the blade and stabilizing your slice, and then pull back and downward. Push, pull. Push, pull. Push, pull.
The two-motion slicing technique is one of the safest ways to develop your slicing knife skills because it anchors the blade. Once you're in with the push, you know exactly where your blade is going with the pull.
The final slicing technique is sawing, which is where you go back and forth repeatedly until you've completely sliced through the ingredient. Sawing isn't ideal, because it generally leaves weird marks along the sides of your slices, or is a good indication that your knife is very dull.
Sawing makes the most sense when you have a dense cooked protein like chicken breast or a large pork loin, and you need to slice it with a knife that isn't very long. Most slicers are 10-12 inches, so you can get away with a push-pull motion since you have so much more blade to work with. But, if you're using a 6-8" all-purpose blade, like a chef's or santoku, you may need to saw a bit, regardless of how sharp your knife is. Use as much of your blade length as possible when sawing, so you have less back-and-forth movement.
Sawing is also great for slicing sourdough with a bread knife, or super barky brisket with any knife!
You should never have to saw through an onion, pepper, tomato, zucchini, garlic, shallots, carrots, and most other everyday fresh produce items, along with raw proteins like chicken, beef, and especially seafood. Pull, or push and pull!
The Push Chop is the most intuitive and effective knife skill and technique you will learn, and the one you should focus on. You don't need to necessarily master it, but definitely become proficient and comfortable with it as your PRIMARY KNIFE SKILL.
The Push Chop is simple; in fact, you already learned half of it with slicing. All you do is push your knife down into the ingredient at about a 45° angle. Depending on the size of the ingredient and the length of your knife, you may have to glide your blade along the cutting board to finish the chop with a slight slice effect.
In the gif below, notice that my hand is first positioned at the back of the cutting board and finishes several inches forward; that's the type of angle you want to see as you finish the chop.
The Push Chop works for any style of knife, even a small petty or utility blade. If you have a knife like the Zwilling Pro Chef's Knife with a super curved tip, you'll want to push chop with more of the back of the blade. However, you can push with most of the entire blade if you have a straighter edge profile like a bunka, santoku, gyuto, or nakiri.
You'll find that developing your Push Chop knife skills will help you understand that this motion is most often used within other cutting techniques. Another great thing about the push chop is that it works for any style of steel, whether that be a softer German Wusthof or a super high 66 Rockwell Japanese Miyabi Black. That straight-into-the-board motion is the best way to keep any edge sharp for as long as possible.
Tap Chopping requires skill and a sturdy guide hand because it works best when tapping quickly. Tap Chopping is a simple repetitive up-and-down vertical motion, which happens more so from the elbow than the wrist. You can Tap Chop slowly, say, when small dicing a potato or onion, but it's more intuitive to Push Chop in those cases. Instead, the Tap Chop is best for thinner cuts, like a julienne or fine julienne, 1/16th to 1/8th in cuts, and done with speed.
In the gif below, you can see how my wrist hardly bends, and the tip of the knife doesn't move forward or back; it's straight up and down. If you want to see a fast Tap Chop, watch this clip from the full Knife Skills video. It was impossible to create a gif of a fast tap chop since my hand was all a blur!
The Rock Chop stems from classic French culinary techniques and knife skills. Back in the day, chefs didn't want to hear the sound of knives on a cutting board—but that's still a thing in some kitchens today!
To perform a Rock Chop, the tip of the knife makes contact with the cutting board in front of the ingredient. Maintaining tip contact throughout the entire repetitive motion, you pull up and back and then down and forward in a circular motion with your wrist. It's essentially a pull-back slice, with a slight push, then a forward slice, and repeat.
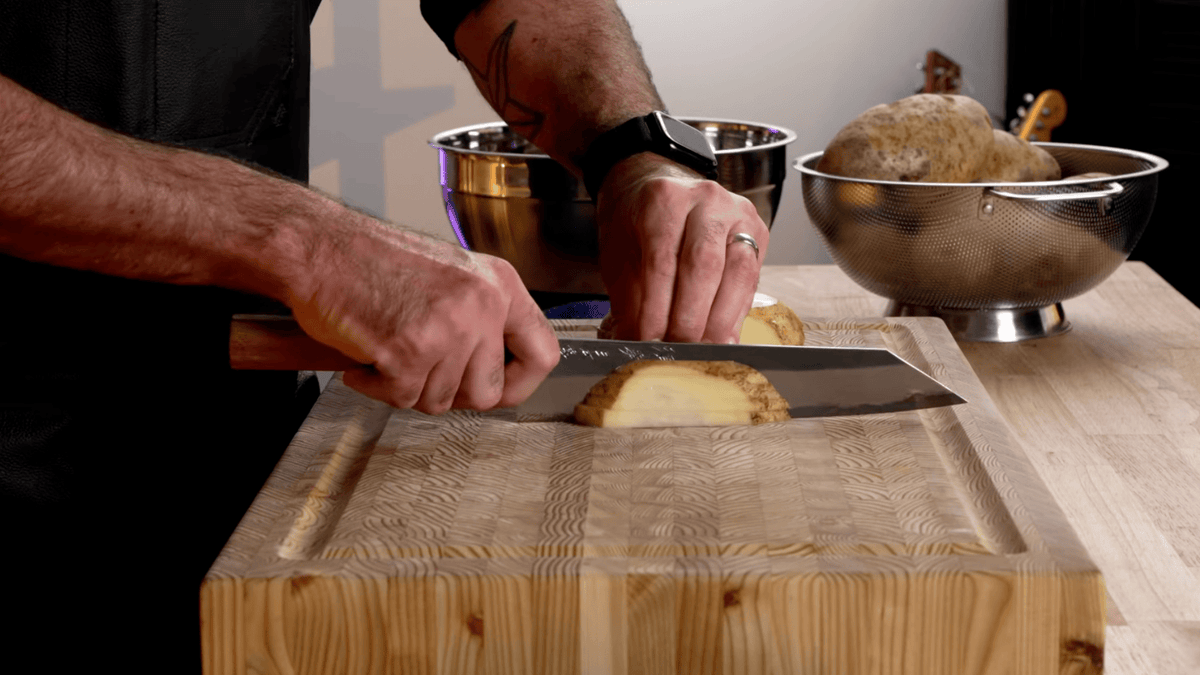
The Rock Chop is great for smaller ingredients that aren't high off the cutting board, like garlic, ginger, chives, scallions, or turmeric. However, when you get into medium to larger ingredients, like shallots, yellow onions, tomatoes, potatoes, etc., you end up having to pull your knife handle way up away from the board, which causes wrist fatigue. It also means the blade is much harder to aim, and since you're making so much movement, it often leads to injury.
Many people think that the Rock Chop is the safest cutting technique since the tip of the knife is always on the cutting board, but it's actually one of the more dangerous because of how much movement is required, especially for larger ingredients, and it generally develops lazy habits.
Guess what can replace the Rock Chop? If you guessed the Push Chop, then you've been paying attention!
If you look at the gif above, you'll see that all that movement can easily be replaced with a simple Push Chop. You can move more from the elbow only instead of bending your wrist, and with simple pushes, you can chop up a potato or do faster push chops for garlic, chives, and other shallower ingredients.
Aside from potential injury and a sore wrist after prepping for 20-30 minutes, the Rock Chop does a number on your blade. Since the tip and mid of your blade always make contact with the cutting board and are then pivoted down the ingredient repeatedly, that twisting or torquing motion will dull your knife super quickly, especially if this is your primary cutting technique.
You can hone and sharpen your knife without issues for softer steel Western knives like a Wusthof, Zwilling, or Messermeister. However, higher Rockwell Japanese knives, with their more acute edges, may suffer from chipping and cracking due to this torquing motion.
You can perform the Rock Chop with super-hard steel knives, but only if you have a delicate touch, let the blade do the work, use a softer cutting board, and only do it when absolutely necessary.
The final on-the-board cutting technique you should know to round out your knife skills is the Cross Chop.
Turn your blade parallel to the back of your cutting board, from left to right. Then, pinch the tip of the blade's spine with your guide hand. Depending on your knife, you may want to maintain the pinch grip with your knife hand, but it's okay to grab onto the handle too. Sometimes, it's nice to reposition after cross-chopping for a while so your wrist doesn't get sore. Now, all you do is anchor the blade with your guide hand, lift up and down with your knife hand, and pivot back and forth.
The Cross Chop is best for mincing fresh herbs, garlic, shallots, jalapenos, and other ingredients that need to be super finely chopped.
Like the Rock Chop, the Cross Chop is best for softer steel Western and German knives. The pivoting motion will dull the blade, which is easy to hone and sharpen on your own. However, if you have any knife above a 61 Rockwell, we wouldn't recommend this cutting technique.
Be sure to watch the Push/Cross Chop section of the YouTube video to see the best way to achieve the same results without damaging the edge of a Japanese blade!
All five knife skills cutting techniques can be used with softer German-style knives without much concern. That's part of what makes them so forgiving and versatile. Yes, you may wear down the blade faster in certain spots, but softer steel is easier to hone and sharpen.
However, if you're using high Rockwell Japanese knives or wish to use them as you develop your knife skills, you need to be more selective:
By aligning your grip, guide hand, and motion with your blade, you'll protect your investment and cut cleaner, faster, and with more confidence in the kitchen.
Now that you know 5 of the most commonly used on-the-board cutting techniques, start practicing to develop your knife skills!
Remember, it's a process that takes time...and sometimes Band-aids.
Chef Brandon Allen
Chef B is our official Digital Slicer at Cutlery and More and proudly identifies as the 1,563,749th Most Okayest Chef in the Universe. Brandon is armed with a collection of over 400 knives and knows just enough blade trivia to impress (or scare off) strangers at dinner parties. Whether he's writing blogs, filming YouTube videos, or editing knife clips for our product pages, he's got a sharp eye for detail and loves the nuance of all things knives. Oh, and he has a lot of Band-Aids on standby, too.
Broadcast uses cookies to improve your browsing experience.


